> ## Documentation Index
> Fetch the complete documentation index at: https://docs.browseros.com/llms.txt
> Use this file to discover all available pages before exploring further.
# How BrowserOS neo works
> A step-by-step walkthrough from download to your first AI-driven browsing session.
This page walks you from a fresh download to your first AI-driven session. Six steps. About five minutes.
Head over to [browseros.com/agents](https://browseros.com/agents) and download BrowserOS neo for your operating system. Install it the way you'd install any other browser.
Once it's open, it works like Chrome or any other browser you've used. Bookmarks, extensions, keyboard shortcuts, all in the same places.
Use BrowserOS neo as your browser for a bit. Sign in to Gmail. Sign in to your calendar. Sign in to Notion, Linear, your CRM, your accounting tool, whatever you use for actual work.
There is nothing special about this step. You are just using a browser. But it matters, because every account you sign in to here becomes something your AI can use later.
Your AI cannot see your personal tabs unless you ask it to. It works in its own tabs, side by side with yours. Signing in to Gmail here means your AI can use Gmail when you ask it to. It does not mean your AI is reading your inbox while you're not looking.
Open a new tab in BrowserOS neo and click **MCP** in the sidebar. You'll see a list of AI tools you can connect with one click.
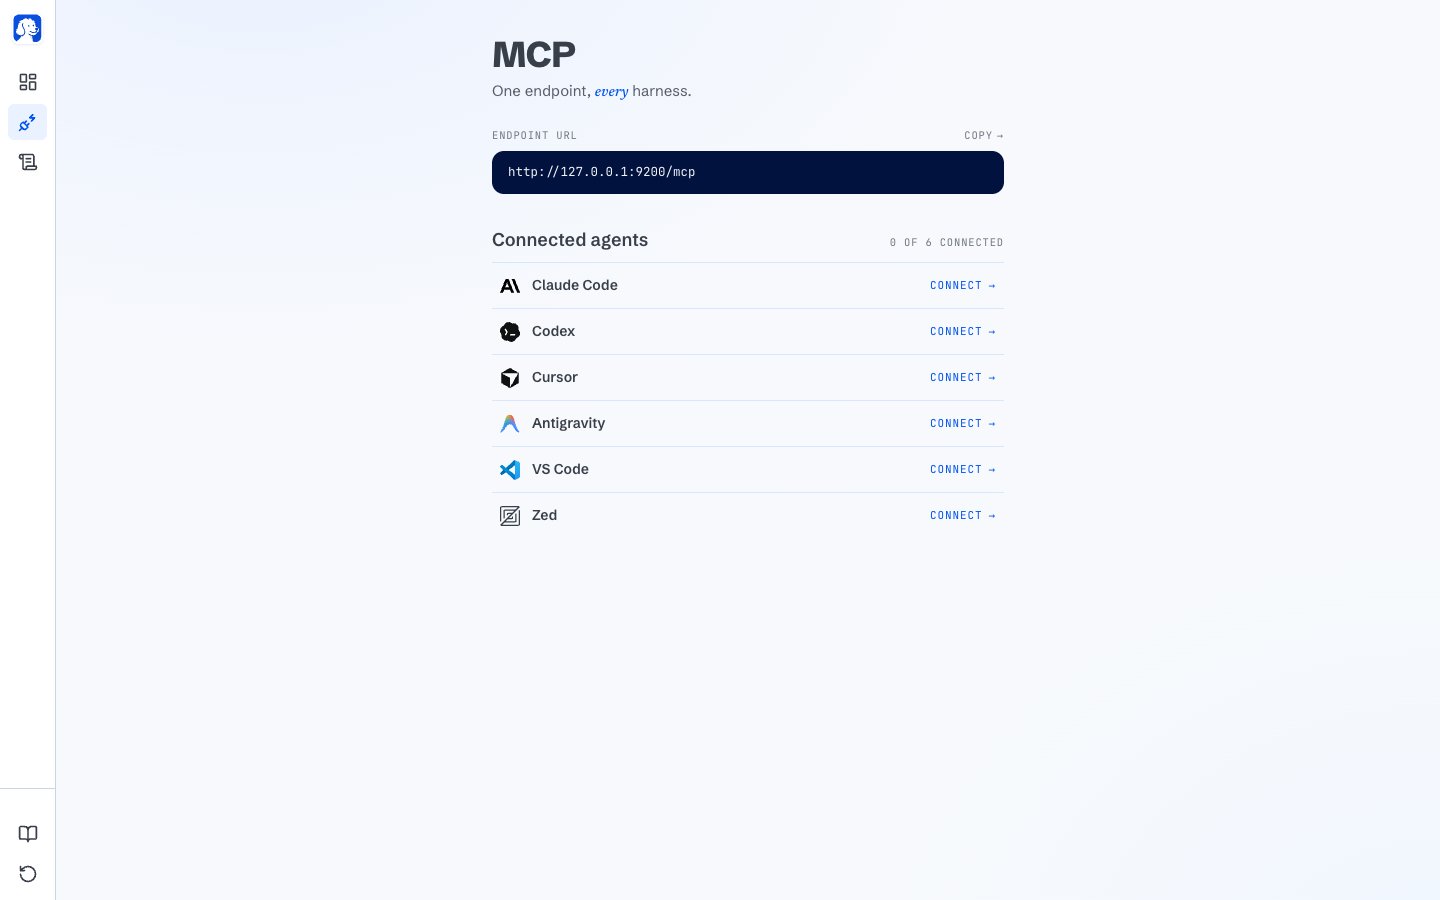 Find the AI tool you use: Claude Code, Cursor, Codex, Antigravity, VS Code, Zed, or another. Click **Connect** on its row. BrowserOS neo sets everything up for you.
Restart your AI tool once, and it now has a browser.
Using an AI tool that isn't listed? Copy the endpoint URL at the top of the page and paste it into your AI's own settings. See the [Connect page](/neo/mcp) for the manual setup.
Open your AI tool and give it a real task. Something you'd actually want done. To start, try this:
```text theme={null}
Find a good time next week for a 30-minute team meeting and send the invite.
```
Or something closer to your own work:
```text theme={null}
Summarize my important unread emails from the last two days.
```
```text theme={null}
Pull the numbers from the Q3 dashboard in Notion and put them in a summary at the top.
```
Whichever you pick, hit send.
Open a new tab in BrowserOS neo. Your AI's session shows up on the dashboard.
Find the AI tool you use: Claude Code, Cursor, Codex, Antigravity, VS Code, Zed, or another. Click **Connect** on its row. BrowserOS neo sets everything up for you.
Restart your AI tool once, and it now has a browser.
Using an AI tool that isn't listed? Copy the endpoint URL at the top of the page and paste it into your AI's own settings. See the [Connect page](/neo/mcp) for the manual setup.
Open your AI tool and give it a real task. Something you'd actually want done. To start, try this:
```text theme={null}
Find a good time next week for a 30-minute team meeting and send the invite.
```
Or something closer to your own work:
```text theme={null}
Summarize my important unread emails from the last two days.
```
```text theme={null}
Pull the numbers from the Q3 dashboard in Notion and put them in a summary at the top.
```
Whichever you pick, hit send.
Open a new tab in BrowserOS neo. Your AI's session shows up on the dashboard.
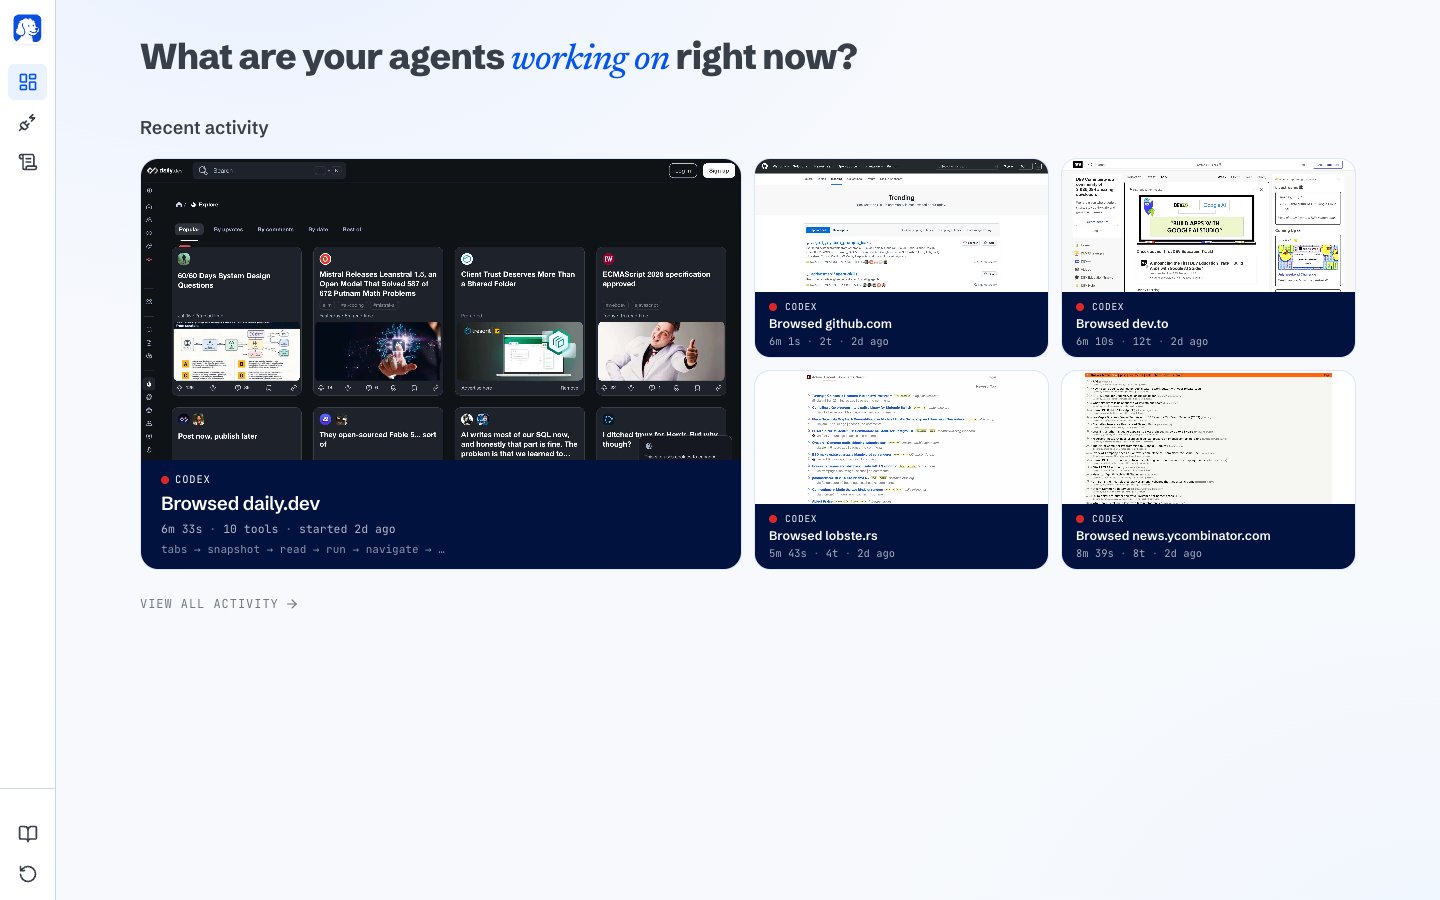 Two things to look at:
* **Running now**: the AI working on your task right now. You'll see the site it's on, how long it's been at it, and a live preview of what it's looking at.
* **Recent activity**: sessions that already finished. Click any tile to open the full story of what happened.
You don't have to sit and stare. Come back whenever you want; the dashboard shows you what's been going on.
When a session finishes, click its tile. Then click **View Session Replay**.
Two things to look at:
* **Running now**: the AI working on your task right now. You'll see the site it's on, how long it's been at it, and a live preview of what it's looking at.
* **Recent activity**: sessions that already finished. Click any tile to open the full story of what happened.
You don't have to sit and stare. Come back whenever you want; the dashboard shows you what's been going on.
When a session finishes, click its tile. Then click **View Session Replay**.
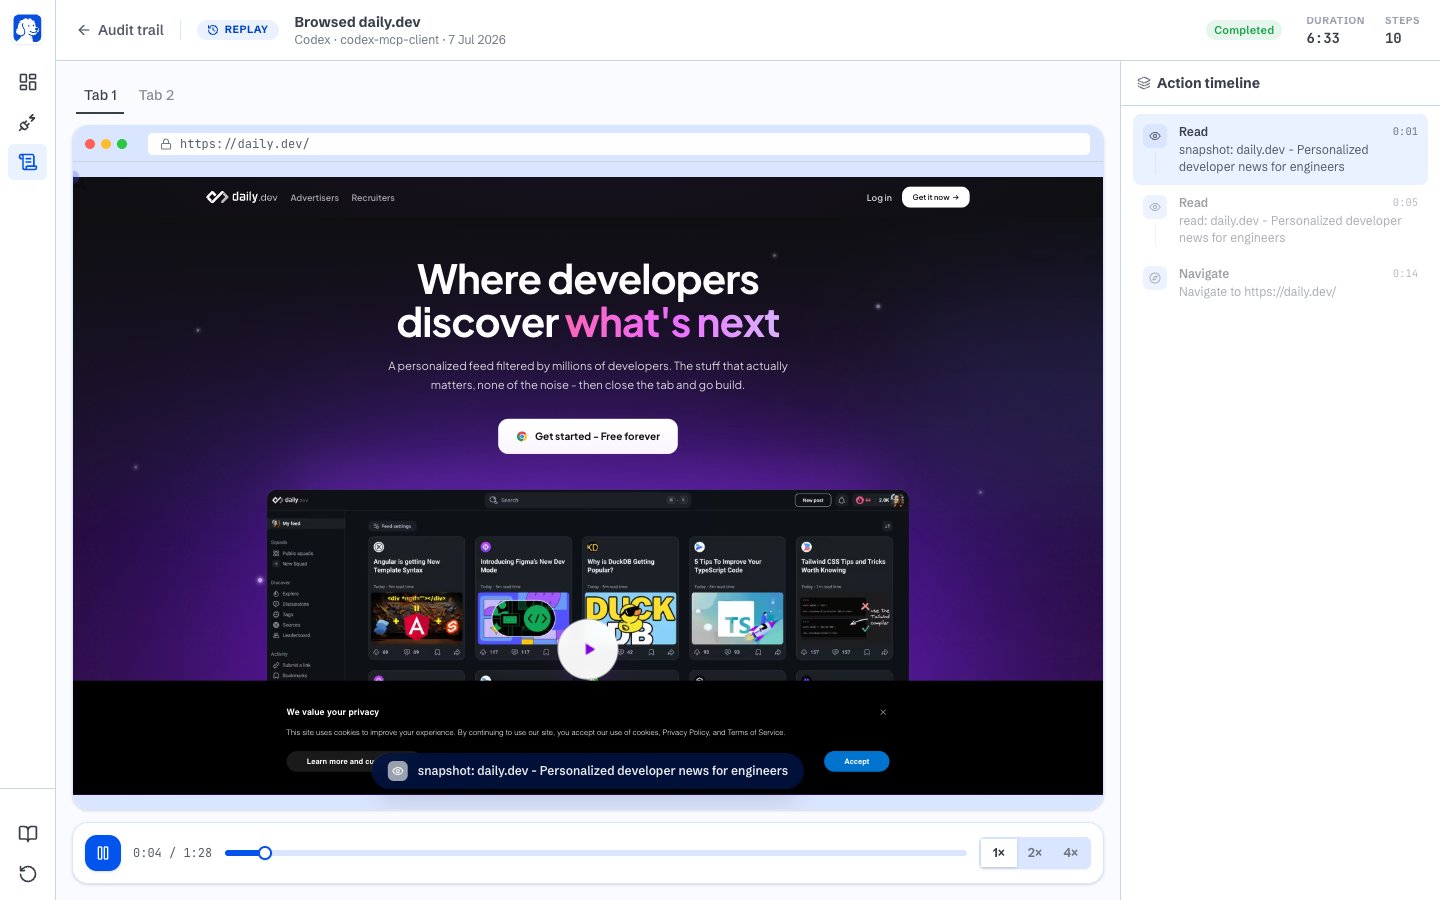 The replay plays back like a video. Hit rewind to see the exact moment things went off, or the exact moment something went well. On the right, every step your AI took is listed in order, and you can click any one to jump the replay to that moment.
Now you know what worked. Tell your AI, and it'll do the next task better.
## Where to next
Every part of the new-tab dashboard and what it tells you.
What BrowserOS neo records, what it doesn't, and where everything lives.
The replay plays back like a video. Hit rewind to see the exact moment things went off, or the exact moment something went well. On the right, every step your AI took is listed in order, and you can click any one to jump the replay to that moment.
Now you know what worked. Tell your AI, and it'll do the next task better.
## Where to next
Every part of the new-tab dashboard and what it tells you.
What BrowserOS neo records, what it doesn't, and where everything lives.