Creating a Scheduled Task
There are two ways to create a scheduled task: from a conversation or from the settings page.From a conversation
After the agent completes a task that could run on a schedule, it will suggest scheduling it with an interactive card. You can also ask directly:- “Schedule this to run every morning”
- “Can this run daily at 8am?”
- “Automate this task”
From settings
1
Open Scheduled Tasks
Click Scheduled Tasks in the sidebar.
2
Click New Task
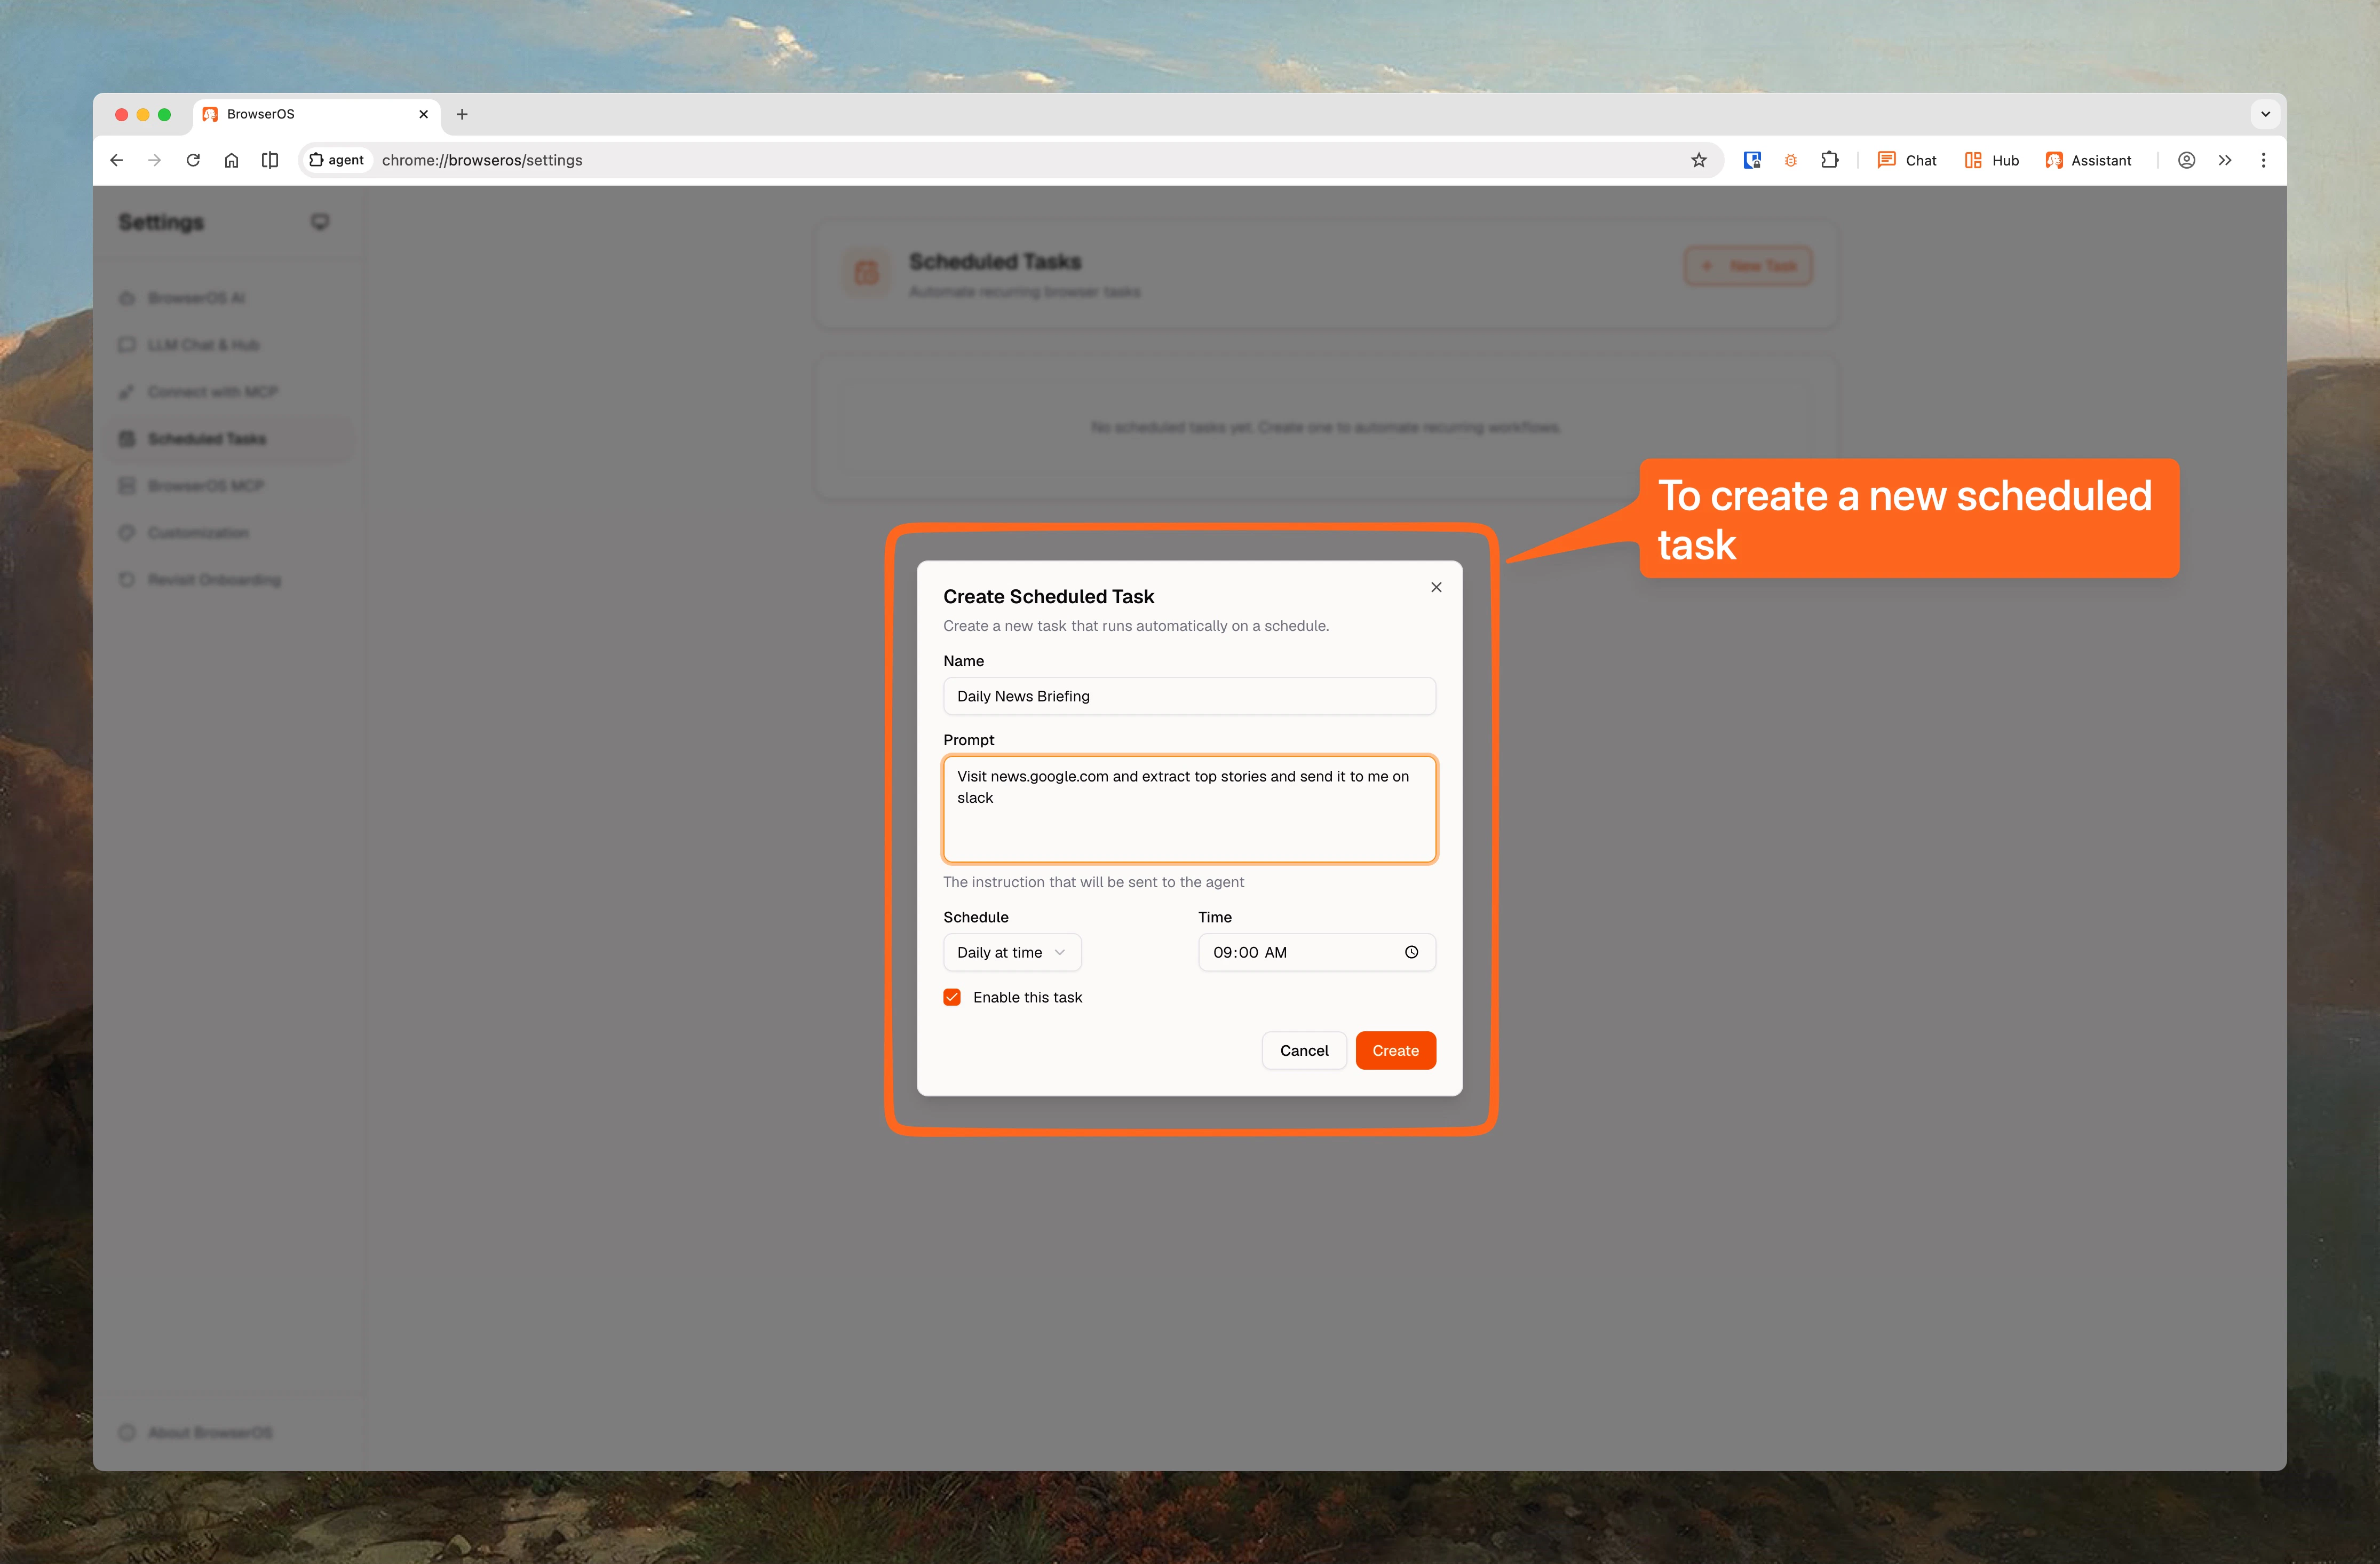
Click the New Task button to open the creation dialog.
3
Fill in the details
- Name: A friendly name for your task
- Prompt: What you want the agent to do (any natural language instruction)
- Schedule type: Daily at a specific time, every N hours, or every N minutes
- Enable: Toggle on to start running immediately
4
Create and go
Click Create. The task will run at the next scheduled time automatically.
Schedule Types
Daily
Runs once a day at a specific time you choose (e.g., every morning at 8:00 AM).
Hourly
Runs every N hours (e.g., every 2 hours, every 6 hours). Set an interval from 1 to 24 hours.
Minutes
Runs every N minutes (e.g., every 15 minutes, every 30 minutes). Set an interval from 1 to 60 minutes.
Example Use Cases
Morning briefing
Morning briefing
Every morning at 8am, check my Google Calendar and send me a summary of today’s events. For each meeting, do a quick Google search on the attendees and include their LinkedIn summary.
LinkedIn automation
LinkedIn automation
Every day, go to LinkedIn and accept up to 25 pending connection requests.
Price monitoring
Price monitoring
Check the price of this Amazon item every hour. If it drops below $50, place the order.
Competitor tracking
Competitor tracking
Every morning at 9am, visit these 5 competitor websites and check for new product announcements or pricing changes. Summarize what is new.
Cross-app workflow
Cross-app workflow
Check my Google Calendar for tomorrow’s meetings, then post a summary to my Slack channel, and create a Notion page with prep notes for each meeting.
Viewing Results
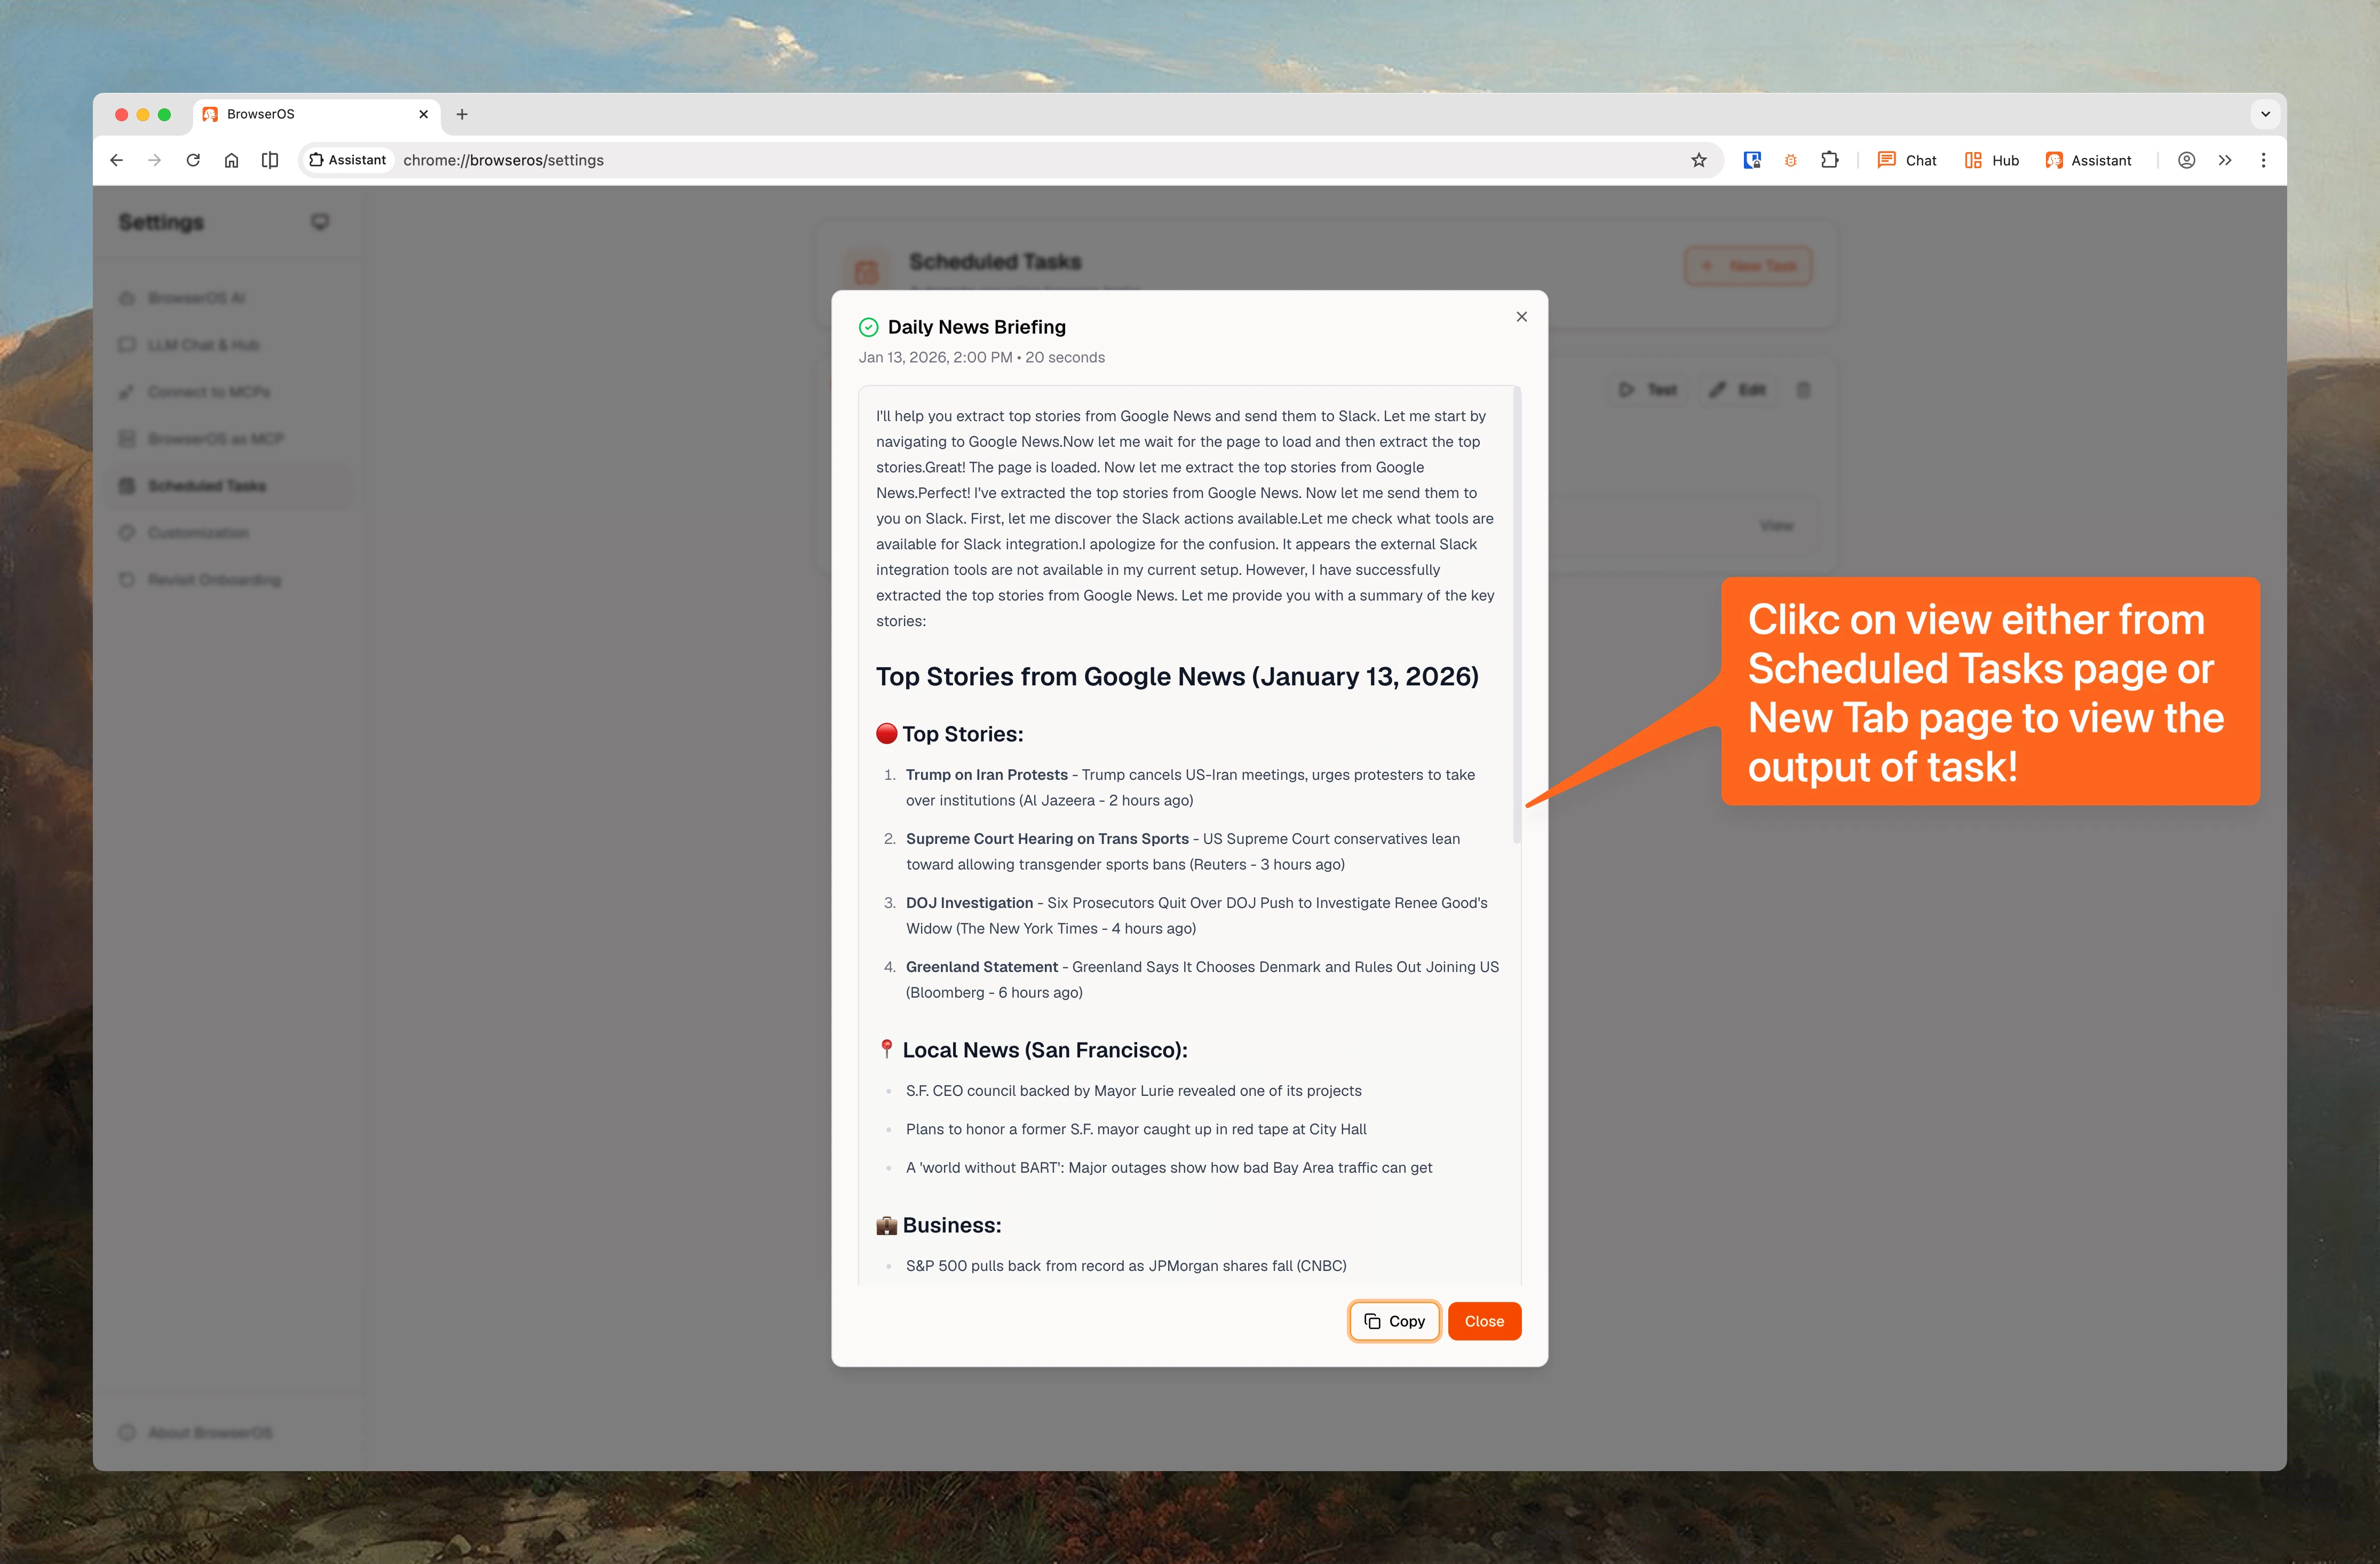
When a scheduled task runs, you can see the results in two places:- New Tab page: Results show up right on your new tab
- Scheduled Tasks page: View the full run history for each task

- Test a task manually without waiting for the next scheduled run
- Retry a failed task
- Cancel a task that is currently running
How It Works
1
Task triggers on schedule
BrowserOS uses your browser’s built-in alarm system to trigger tasks at the right time. If your laptop was closed at the scheduled time, the task runs as soon as you open BrowserOS again.
2
Background window opens
A hidden browser window opens automatically. The task runs there so it never interrupts whatever you are working on. You will not see anything happen on screen.
3
Agent executes your prompt
The agent runs your prompt with full access to browser automation and any connected apps. It can navigate pages, fill forms, extract data, and interact with your services.
4
Results are saved
When the task finishes, the result is saved and appears on your New Tab page and in the task’s run history. The hidden window closes automatically.
BrowserOS needs to be open for scheduled tasks to run. Tasks have a 10-minute timeout. If a task takes longer than that, it will be marked as failed and you can retry it.
Cloud Sync
If you are signed in, your scheduled task configurations sync across devices. Create a task on your laptop and it appears on your desktop. Edits sync both ways, and conflicts are resolved automatically using timestamps. Only the schedule setup syncs (name, prompt, schedule type, and timing). Task run results and output stay on the device where the task ran. See Sync to Cloud for more details.Privacy
Runs locally
All tasks run on your machine in a hidden browser window. Nothing is sent to external servers.
Full control
Enable, disable, edit, or delete any task at any time. You decide what runs and when.